
Download Windows Watermark Editor v1.0.0 Free
 Download Now ( 100% Working Link )
Windows Watermark Editor is a free online tool that allows you to add text or images to your photos. You can also use it to create custom watermarks for your own website or blog.
If you are looking for a free watermark editor for Windows, then you have come to the right place. In this post, we will be discussing some of the best free watermark editors available for Windows 10. Watermarks are an important part of image protection.
They help to prevent unauthorized use of images and can also be used to add a personal touch or brand identity to photos. A good watermark editor should be easy to use and allow you to create custom watermarks quickly and easily. While there are many paid options available, there are also some excellent free watermark editors that will do the job just as well. You Can Also Download Graphicriver 3D Photo Effect PS Action Crack
Here are our top picks:
- uMark Watermark Editor uMark is a great choice for anyone looking for a simple yet effective watermark editor. It offers a wide range of features including the ability to batch process files, support for transparency, and more. uMark also allows you to create text or logo-based watermarks with ease. Overall, it is an excellent choice for anyone looking for a free watermark editor for Windows 10.
- FastStone Photo Resizer FastStone Photo Resizer is another great option when it comes to free watermark editors for Windows 10. It is lightweight and easy to use, yet packed with features such as support for multiple languages, batch processing, drag and drop support, and more. You can also add text or logo-based watermarks using FastStone Photo Resizer with ease.
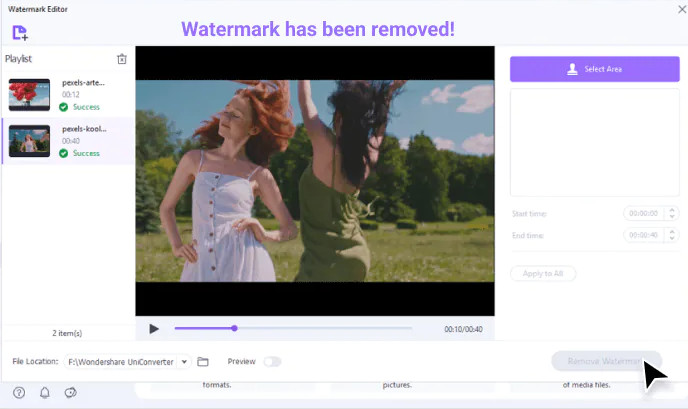 Windows Watermark Remover
If you’re sick of seeing that “Windows 10 Pro” watermark in the corner of your screen, there’s good news- you can remove it! Whether you’re running Windows 10 Home or Pro, it’s easy to get rid of that pesky watermark. Here’s how:
First, open the Registry Editor by pressing Windows Key + R and typing “regedit”. Next, navigate to HKEY_LOCAL_MACHINE SYSTEM Current Control Set Control Watermark. In the right pane, double-click on “RemoveWatermark” and change the value from 0 to 1.
Finally, restart your computer for the changes to take effect. And that’s it! Once you’ve followed these steps, the watermark will be gone for good.
If you ever want to add it back (perhaps you’re selling your computer and want to show off that it’s running Windows 10 Pro), simply follow the same steps and change the value back to 0.
Why Did Activate Windows Watermark Appear
Windows 10 is a personal computer operating system developed and released by Microsoft as part of the Windows NT family of operating systems. It was released on July 29, 2015.Windows 10 received mixed reviews upon its original release in 2015. Critics praised Microsoft’s decision to provide a free upgrade to Windows 10 from Windows 8.1 and 7, but criticized the company for some of its new policies, such as mandatory updates and adware bundled with the installation files.
The “Activate Windows” watermark is displayed in the bottom right-hand corner of the screen when you have not yet activated your copy of Windows 10. This can happen for a number of reasons, including if you are using an evaluation copy that has expired, or if you have installed a pirated copy of Windows 10. Regardless of the reason, it is important to note that you will not be able to use all features of Windows 10 until you activate it.
If you are seeing this watermark on your screen, there are a few different ways that you can go about activating your copy of Windows 10. The first option is to purchase a valid license key from Microsoft or another authorized retailer; once you have done this, simply enter the key into the appropriate field in Settings and follow the prompts to complete activation. If you do not want to purchase a license key, another option is to reinstall Windows 10 from scratch using official installation media; during setup, you will be prompted to enter a valid product key (which can be obtained from Microsoft) to complete activation.
Finally, if neither of these options is feasible for you, it is also possible to remove the watermark without activating Windows 10 by editing certain registry keys; however, we do not recommend this course of action as it could potentially lead to stability issues with your system down the road.
Edit Watermark Word
If you’re looking to add a watermark to your Microsoft Word document, there are a few different ways you can do it. Here’s a step-by-step guide on how to edit a watermark in Word. First, open up your document in Microsoft Word.
Then, click on the “Insert” tab at the top of the screen. In the “Text” section of the Insert tab, click on the “Watermark” button. This will bring up the Insert Watermark dialog box.
From here, you can choose what type of watermark you want to insert into your document. There are a few different options available, such as “Text,” “Picture,” and “Do Not Print.” Once you’ve selected the type of watermark you want to use, enter the text or image that you want to appear in your document.
If you’re using an image for your watermark, make sure it’s inserted into your document before continuing. When you’re happy with how your watermark looks, click “OK” to insert it into your document. Your watermark will now appear throughout your document!
Windows 10 Watermark Remover V2
Watermarks are a common sight in Windows 10. They’re usually used to mark an image or photo as copyrighted, preventing others from stealing it. However, sometimes watermarks can be annoying, especially if they’re on your own personal photos.
Luckily, there’s an easy way to remove them with the Windows 10 Watermark Remover V2 tool. This tool is designed specifically for removing watermarks from images and photos. It supports a wide range of file types, including JPG, PNG, BMP, and TIFF.
Best of all, it’s completely free to use. Simply download the tool and follow the instructions on the website to remove any watermarks from your photos.
Edit Watermark Online
If you’re looking to add a watermark to your photos, there are a few different ways to do it. One way is to edit your watermark online. There are plenty of websites that offer this service, and it’s usually pretty easy to use.
All you need is the photo you want to watermark and the watermark itself. Most of these sites will allow you to upload both the photo and the watermark. Once they’re uploaded, you can position the watermark wherever you like on the photo.
You can also usually adjust the size and opacity of the watermark. Once you’re happy with how everything looks, you can save the image and download it onto your computer. This method is quick and easy, and it doesn’t require any special software or skills.
Plus, it’s free! So if you’re looking for a quick and easy way to add a watermark to your photos, editing them online is definitely worth considering.
Some FAQ:
How Do I Create a Watermark in Windows?
If you’re looking to add a watermark to your images in Windows, there are a few different ways you can do it. Here’s a step-by-step guide on how to create a watermark in Windows using the built-in Photos app:
- Open up the Photos app and click on the image you want to add a watermark to.
- On the top toolbar, click on the Edit & Create button.
- In the sidebar that appears, click on Watermark under the Create section.
- In the next window, select whether you want to use text or an image for your watermark.
If you choose text, you can then type in whatever message you want to appear on your image. For an image watermark, you’ll need to browse for and select the image file that you want to use. 5. Once you’ve chosen your watermark type and added your message or selected your image file, click on Apply at the bottom of the window.
And that’s all there is to it! Your watermarked image will now be saved as a separate file in Windows’ Photos app so that you can share it online or elsewhere without worry about someone stealing it or claiming it as their own work.
How Do I Get Rid of the Activate Windows Watermark 2023?
If you’re sick of seeing the “Activate Windows” watermark on your screen, there are a few things you can do to get rid of it. First, make sure that you actually have a valid license for Windows. If you do, then you can try activating it by going to Settings > Update & Security > Activation and entering your product key.
If that doesn’t work, or if you don’t have a valid license, then the only other way to get rid of the watermark is to use a third-party tool like Remove WatermarkX. This will remove the watermark from your screen, but it’s not an official solution from Microsoft so use it at your own risk.
How to Remove Watermark Windows 10?
If you’re using Windows 10 and want to remove a watermark, there are a few different ways you can go about it. One option is to use the Registry Editor to delete the watermark key. Another option is to use a third-party tool like Universal Watermark Disabler.
To use the Registry Editor:
- Press the Windows key + R to open the Run dialog box.
- Type regedit and press Enter.
- This will open the Registry Editor.
- In the left pane, navigate to HKEY_LOCAL_MACHINE\SOFTWARE\Policies\Microsoft\Windows\Explorer. If you don’t see the Explorer key, you may need to create it.
- To do this, right-click on Windows and select New > Key from the menu. Name the new key Explorer.
- In the right pane, look for a DWORD value named Disable Logo Display. If it exists, double-click on it and set its value to 1. If it doesn’t exist, right-click in an empty area of the pane and select New > DWORD (32-bit) Value from the menu. Name it DisableLogoDisplay and set its value to 1.
- Close out of Registry Editor and restart your computer for changes to take effect After rebooted check windows setting if water mark is GONE! congratulations!!
Can You Add a Watermark to Windows Video Editor?
Yes, you can add a watermark to Windows video editor.
Here’s how:
- Open the video in Windows video editor.
- Select the “Effects” tab.
- Scroll down to the “Watermark” section and select “Add Watermark.”
- Select the image or text you want to use as your watermark.
- Position the watermark on the video preview window where you want it to appear.
Conclusion
Windows Watermark Editor is a free online tool that allows users to add text or images to their photos. The user can select the size, font, color, and position of the watermark. The edited photo can be saved in either JPG or PNG format.
 Download Windows Watermark Editor v1.0.0 Free